Gelly Sandwich

What is a Gelly Sandwich you ask? It’s when you use regular Nail Polish between layers of Gelish Base and Top Coat. This technique is easy to do and saves you from having to buy expensive Gelish polishes – just keep using your favourite regular polishes!


Here is my most recent Gelly Sandwich
IMG_2244

Want to know how to achieve this look? Keep reading….

What you need:

-Led Lamp for Gel Manicures

-Gelish ph Bond

-Gelish Foundation

-Gelish Top It Off

-Your favourite Nail Polish

-Cuticle Pusher

-Gelish Nail Surface Cleanse

-Nail File and Nail Buffer

1) Buff all shine off of your natural nails. Then file them to your preferred shape. Use nail surface cleanse to remove any dust and dirt.

2) Apply pH Bond to all nails

3) Apply Gelish Foundation to thumb first, then the rest of your nails

4) Cure under LED Lamp for 45 seconds (or as indicated on your lamp)

5) Apply first coat of Nail Polish

6) Let completely dry, then apply second coat of Nail Polish

7) After Nails are completely dry (no tacky) apply Gelish Top It Off top coat

8) Cure under LED Lamp

9) Use Nail Surface Cleanse to remove tacky residue

10) Use oil around cuticles to hydrate

** If necessary, apply two coats of Gelish Top Coat

Check out my quick tutorial to see how its done!!

Nail Polish Crazy!

Hey there old friends! So – I’ve got this obsession with nail polish! And over the year I’ve been really stocking up my collection! Let me share a few of my favourites with you!

All polishes have had one coat of China Glaze Base Coat and one coat of OPI Top Coat!

Image

China Glaze – Pink Voltage (Neon) and China Glaze – Nova

IMG_1271

China Glaze – Call Of The Wild

IMG_1285

China Glaze – It’s A Trap-Eze! on top of China Glaze – White on White

IMG_1291

China Glaze – Snap My Dragon

IMG_1304 IMG_1441

China Glaze – I’m Not Lion (gold) and China Glaze – With Love

With Love by China Glaze is my favourite Nail Polish colour in my whole collection. Visit Nailpolishcanada.com for a huge selection of Nail Polish colours. This company is great! They are based out of Richmond, BC and ship via Canada Post within the next business day. I have been so happy with their services so far and will continue using them going forward.

Stay tuned for my next post where I venture into Gel Nail Polish!

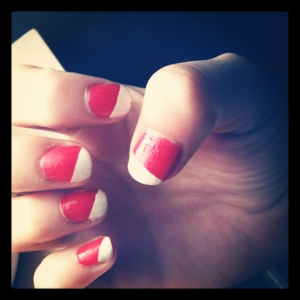
Funky Dual Coloured Nails

I decided to try something new with my nails because I’m getting bored with having my nails one solid colour. Here is something to try that’s really fun and easy!

20120711-071949.jpg

To achieve this look, first paint your nails your favourite colour – wait for them to completely dry. Then take small pieces of tape and press them over the area of your nail that you don’t want to change colour. Then, take your next colour and carefully paint over the exposed part of your nail. Let the polish dry to the point of just being tacky, and slowly pull the tape of in the direction of your stripe. Do one finger at a time so it doesn’t get messy – start at the pinky and work your way towards the thumb. After all of your nails are totally dry – put on a layer of top coat!